Jetpack Compose inside

An important caveat: we’re going to look at internals, and they tend to change. If you read this report in the recording, something might have changed. But the main thing will remain unchanged – the core principles (and the parameters that we generate will change, their sequence or something else).
We do not store the virtual representation as a tree, but use a Gap buffer. This is a classic but little-known data structure used in text editors like vim and Emacs. She has, roughly speaking, a list, and in this list there is a gap. Gap is one, it can be large or small, it can be increased. And we can perform certain operations in this Gap buffer. The first logical operation is insert. This is an add operation, and it is constant.
After adding elements, you can invalidate the Gap buffer: return to a specific position, view and update the element. We can also move the Gap to a specific element by placing subsequent elements after the Gap:
This is the only operation that takes linear time, the rest have constant time. We can add elements, change the structure, expand the Gap buffer and remove what was behind it. We can add, update and remove items in constant time.
We cannot wedge in the middle quickly and add elements there. This is a tradeoff that we do in Compose with the expectation that the structure of our particular UI does not change so often, less often than updates occur. For example, there is a text View, and a line of text changes in it more often than it turns into an icon.
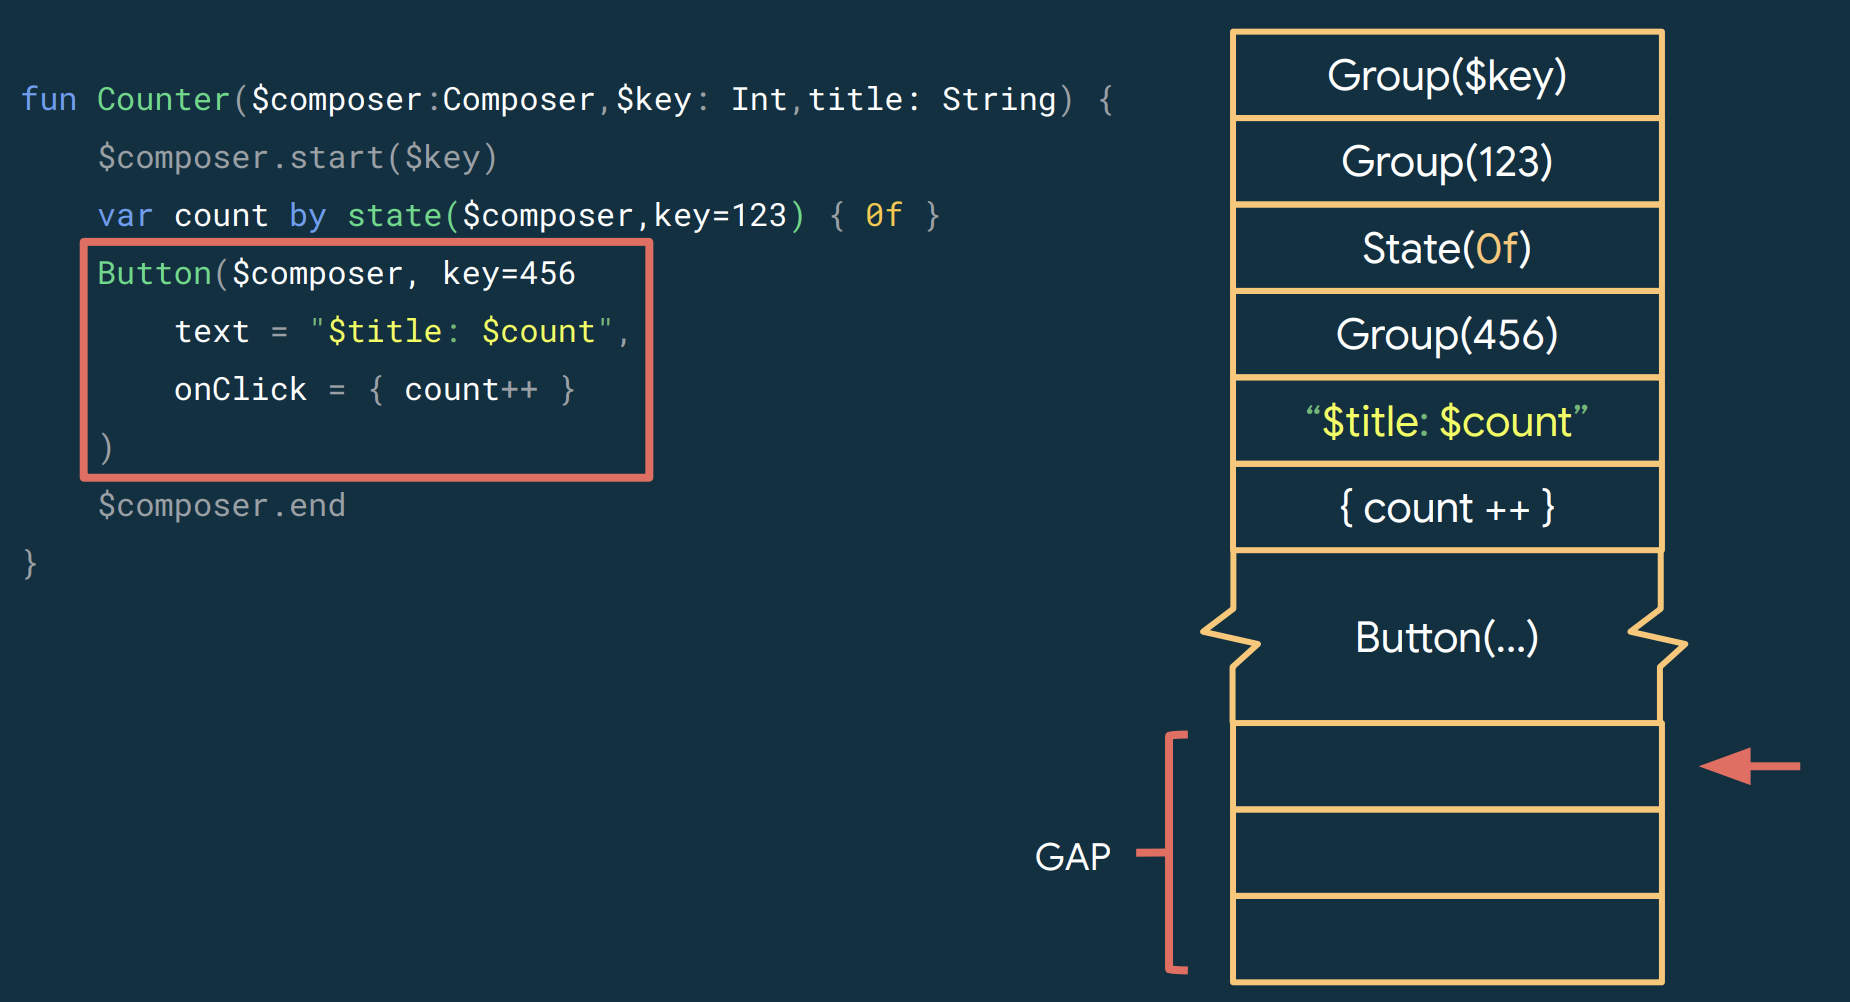
So, let’s look at a real example of what happens in the Gap buffer. We will do something like this: we have Mobius, we click – the counter is updated.
How do I do it with Jetpack Compose? We can make a Composable function:
@Composable
fun Counter (title: String) {
var count by state {0f}
Button (
text = “$ title: $ count”,
onClick = {count ++}
)
}
We can set the state (we’ll figure out how this works later – the main thing is that there is a wrapper that I can update on click). And we have a Button with $ title (in this case Mobius) and count (first 0, incremented on click).
This is going to be a boom moment because we’ll take a look at what the @Composable annotation does. It turns the code into something like this:
fun Counter ($ composer: Composer, $ key: Int, title: String) {
$ composer.start ($ key)
var count by state ($ composer, key = 123) {0f}
Button ($ composer, key = 456
text = “$ title: $ count”,
onClick = {count ++}
)
$ composer.end
}
What’s going on here? We have a composer here, you can refer to it as accessing the Gap buffer. And that is why only composable functions can contain composable functions: they all need a Gap buffer, they need a scope, where they are now, they need the current position of the Gap buffer.
We also insert keys. This is a unique key, it is important that they are different, and different buttons will have different keys.
We also insert the composer.start function at the beginning and composer.end at the end.
Let’s see what happens if I take this function and apply it to the UI.